Setting Maintenance Windows
You can schedule planned maintenance for your API, app or website using Checkly’s maintenance windows. During maintenance windows, checks that are part of a specific window are not scheduled to run, saving you the headache of ignoring alerts and having big red callouts on your dashboard. Maintenance windows are also exposed on our public api.
Creating a maintenance window
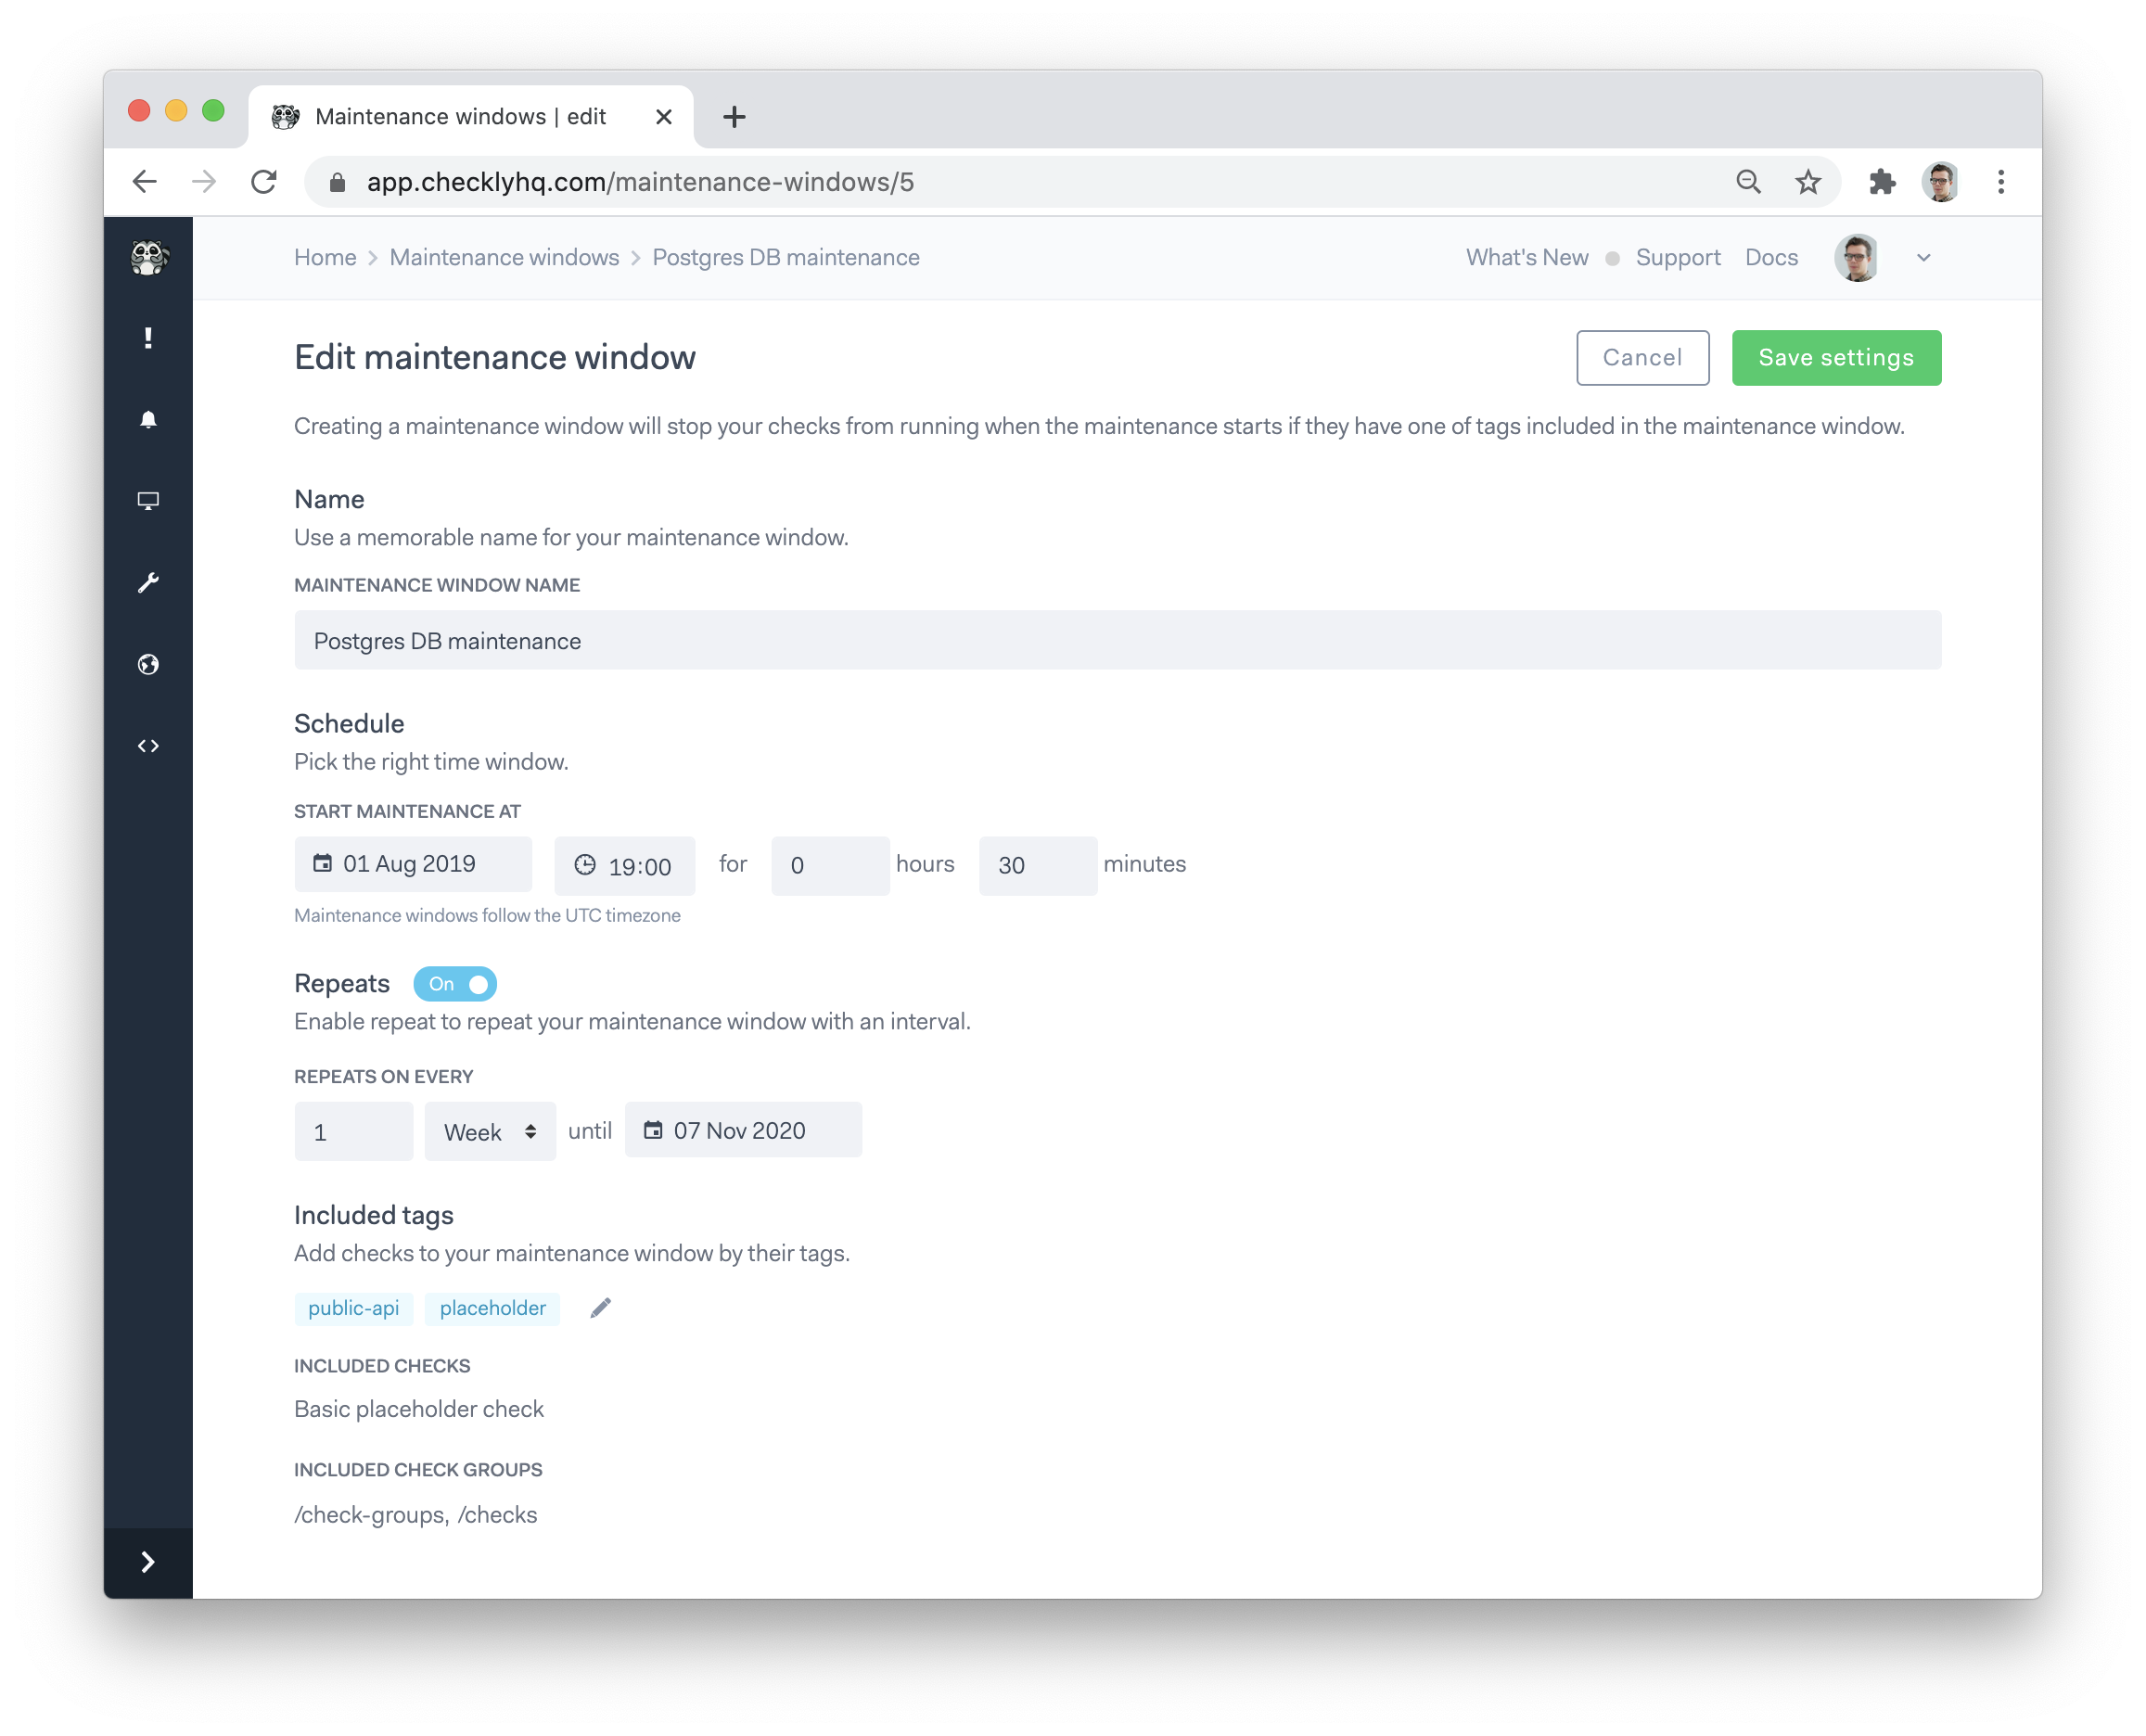
Adding a maintenance window is simple. Navigate to the maintenance windows overview indicated by the wrench icon on the menu and click “create new”. You’re now on the maintenance window editor.

After giving your window an appropriate name, the core options you have are:
Setting a schedule
Set your preferred starting date and time for your maintenance window. Note that all times are in UTC.
Setting repeats
If your maintenance window repeats at a certain cadence, toggle the repeat option. Here you can set
- The amount of repetitions.
- The unit of repetition, i.e. Day, Week or Month.
- The date on which the repetition cycle should end.
Adding checks and check groups
You need to select which checks and/or check groups are targeted by your maintenance window. You do this by:
- Adding the relevant check tags.
- Adding the relevant check group tags.
This way, any checks or check groups created after creating your maintenance window can still be made part of the window; no need to update the maintenance window configuration. Just set the correct tags.
Last updated on December 2, 2024. You can contribute to this documentation by editing this page on Github